
Disclosure: If you make a purchase through the links posted below, I may receive a small compensation. Read the full disclosure.
Adults & Crafts delivers customized DIY craft kits to your door each month. Boxes will include everything you need to go from zero to crafting hero—materials, instructions, and (most) tools you need to complete any one of their unique projects.
Adults & Crafts
Cost: $39.95/month. ($33 + $6.95 S/H)
Ships To: United States.
Coupon Code: “GETCRAFTY” to get free shipping.
Disclosure: This complimentary box was received for review purposes. All opinions are my own, and no compensation was received.

Adults & Crafts ships via USPS, FedEx or UPS depending on what they are sending that month and your location. My box shipped via USPS.
Instructions
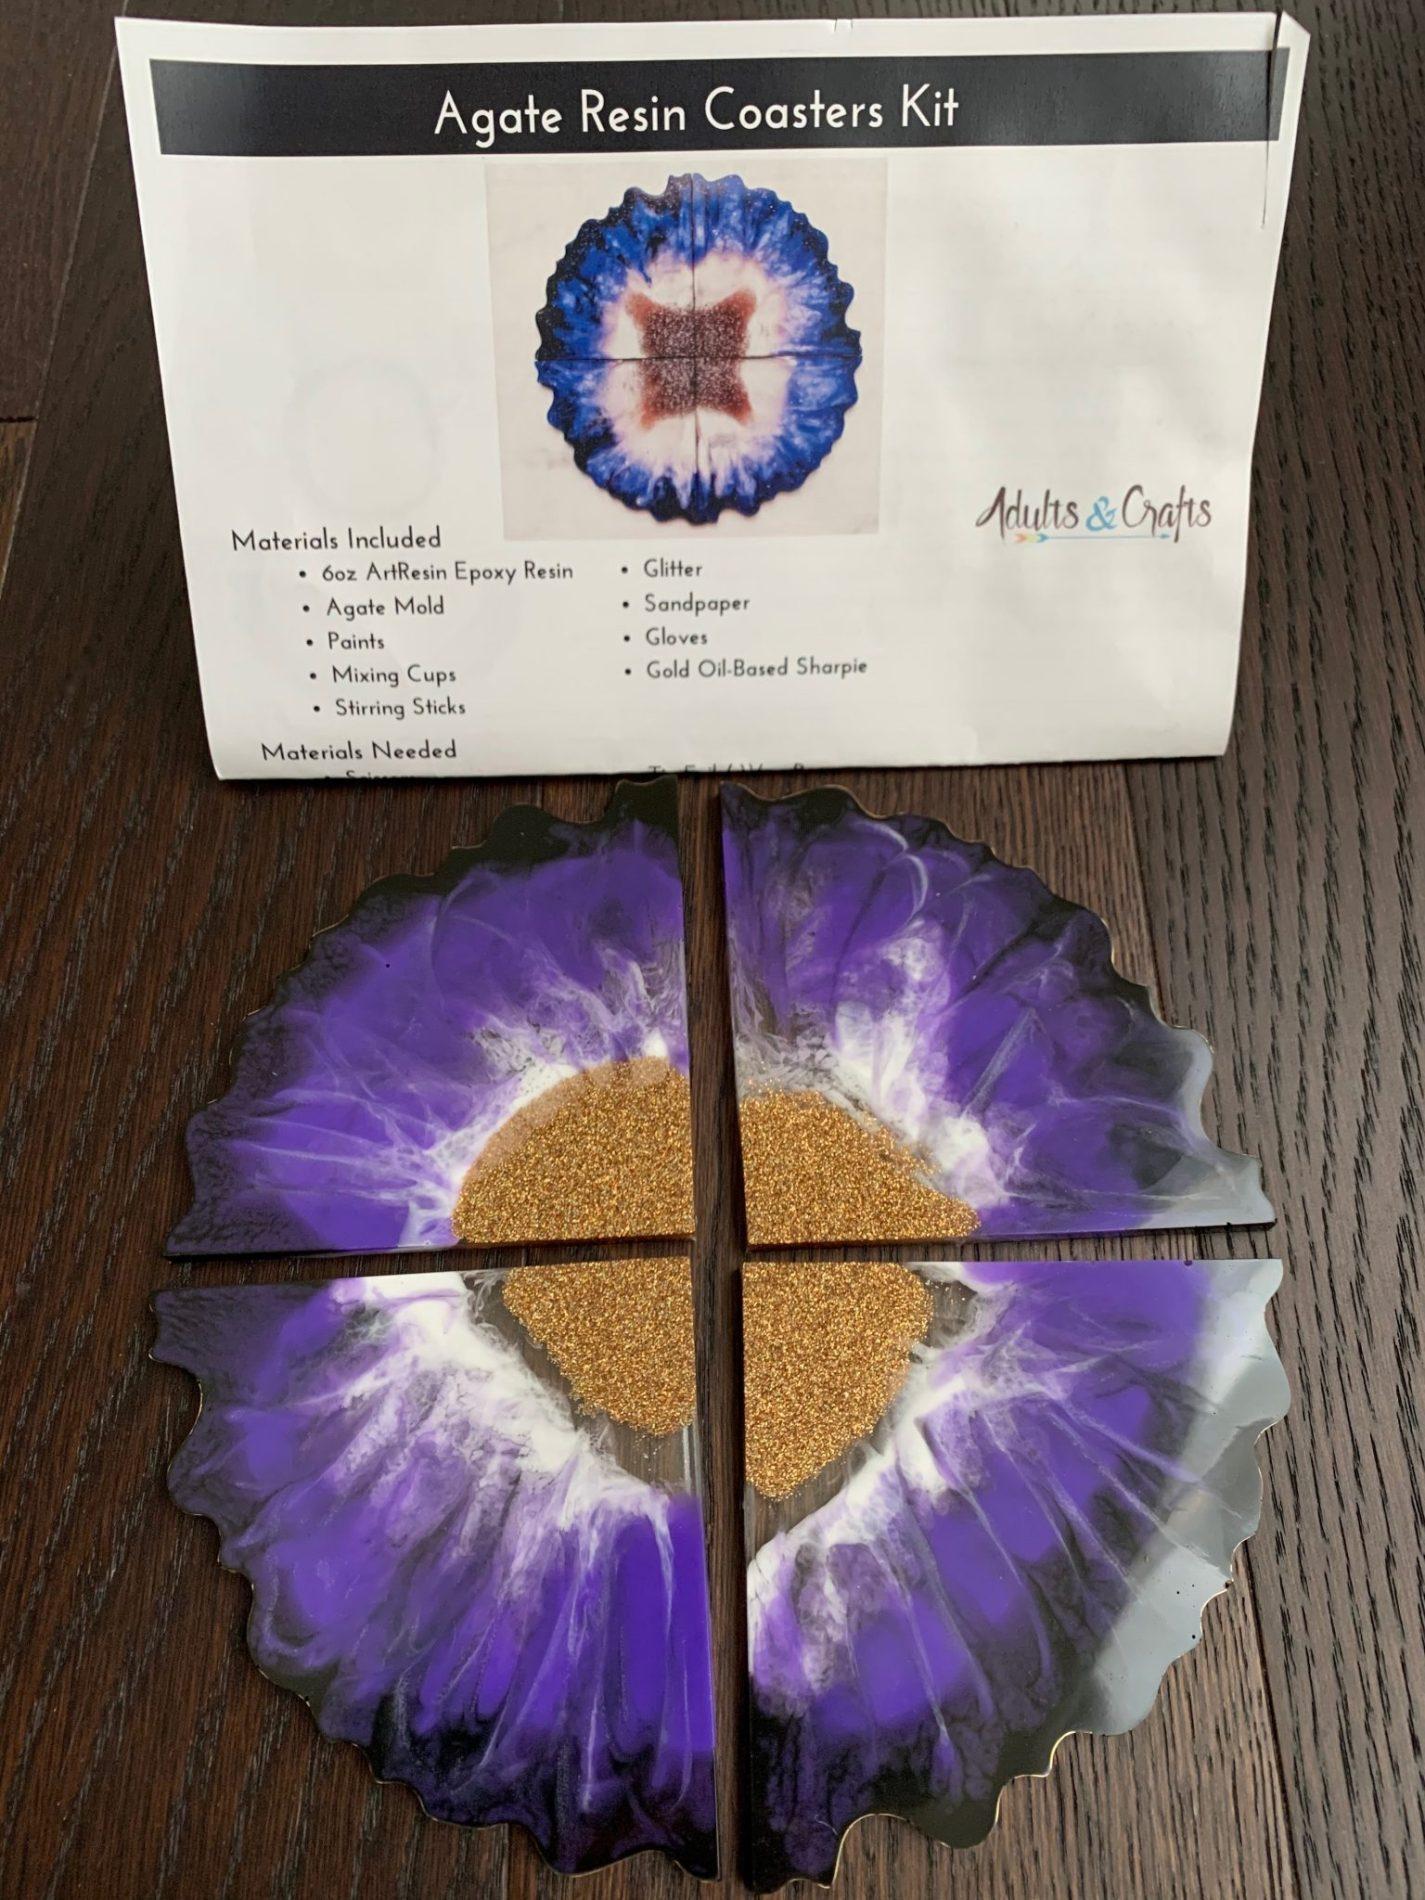
This month featured a Agate Resin Coasters Kit. We have so much down time right now that I got started on this as soon as it arrived on my doorstep. Adults & Crafts projects always include detailed instructions that are very clear and easy to understand.
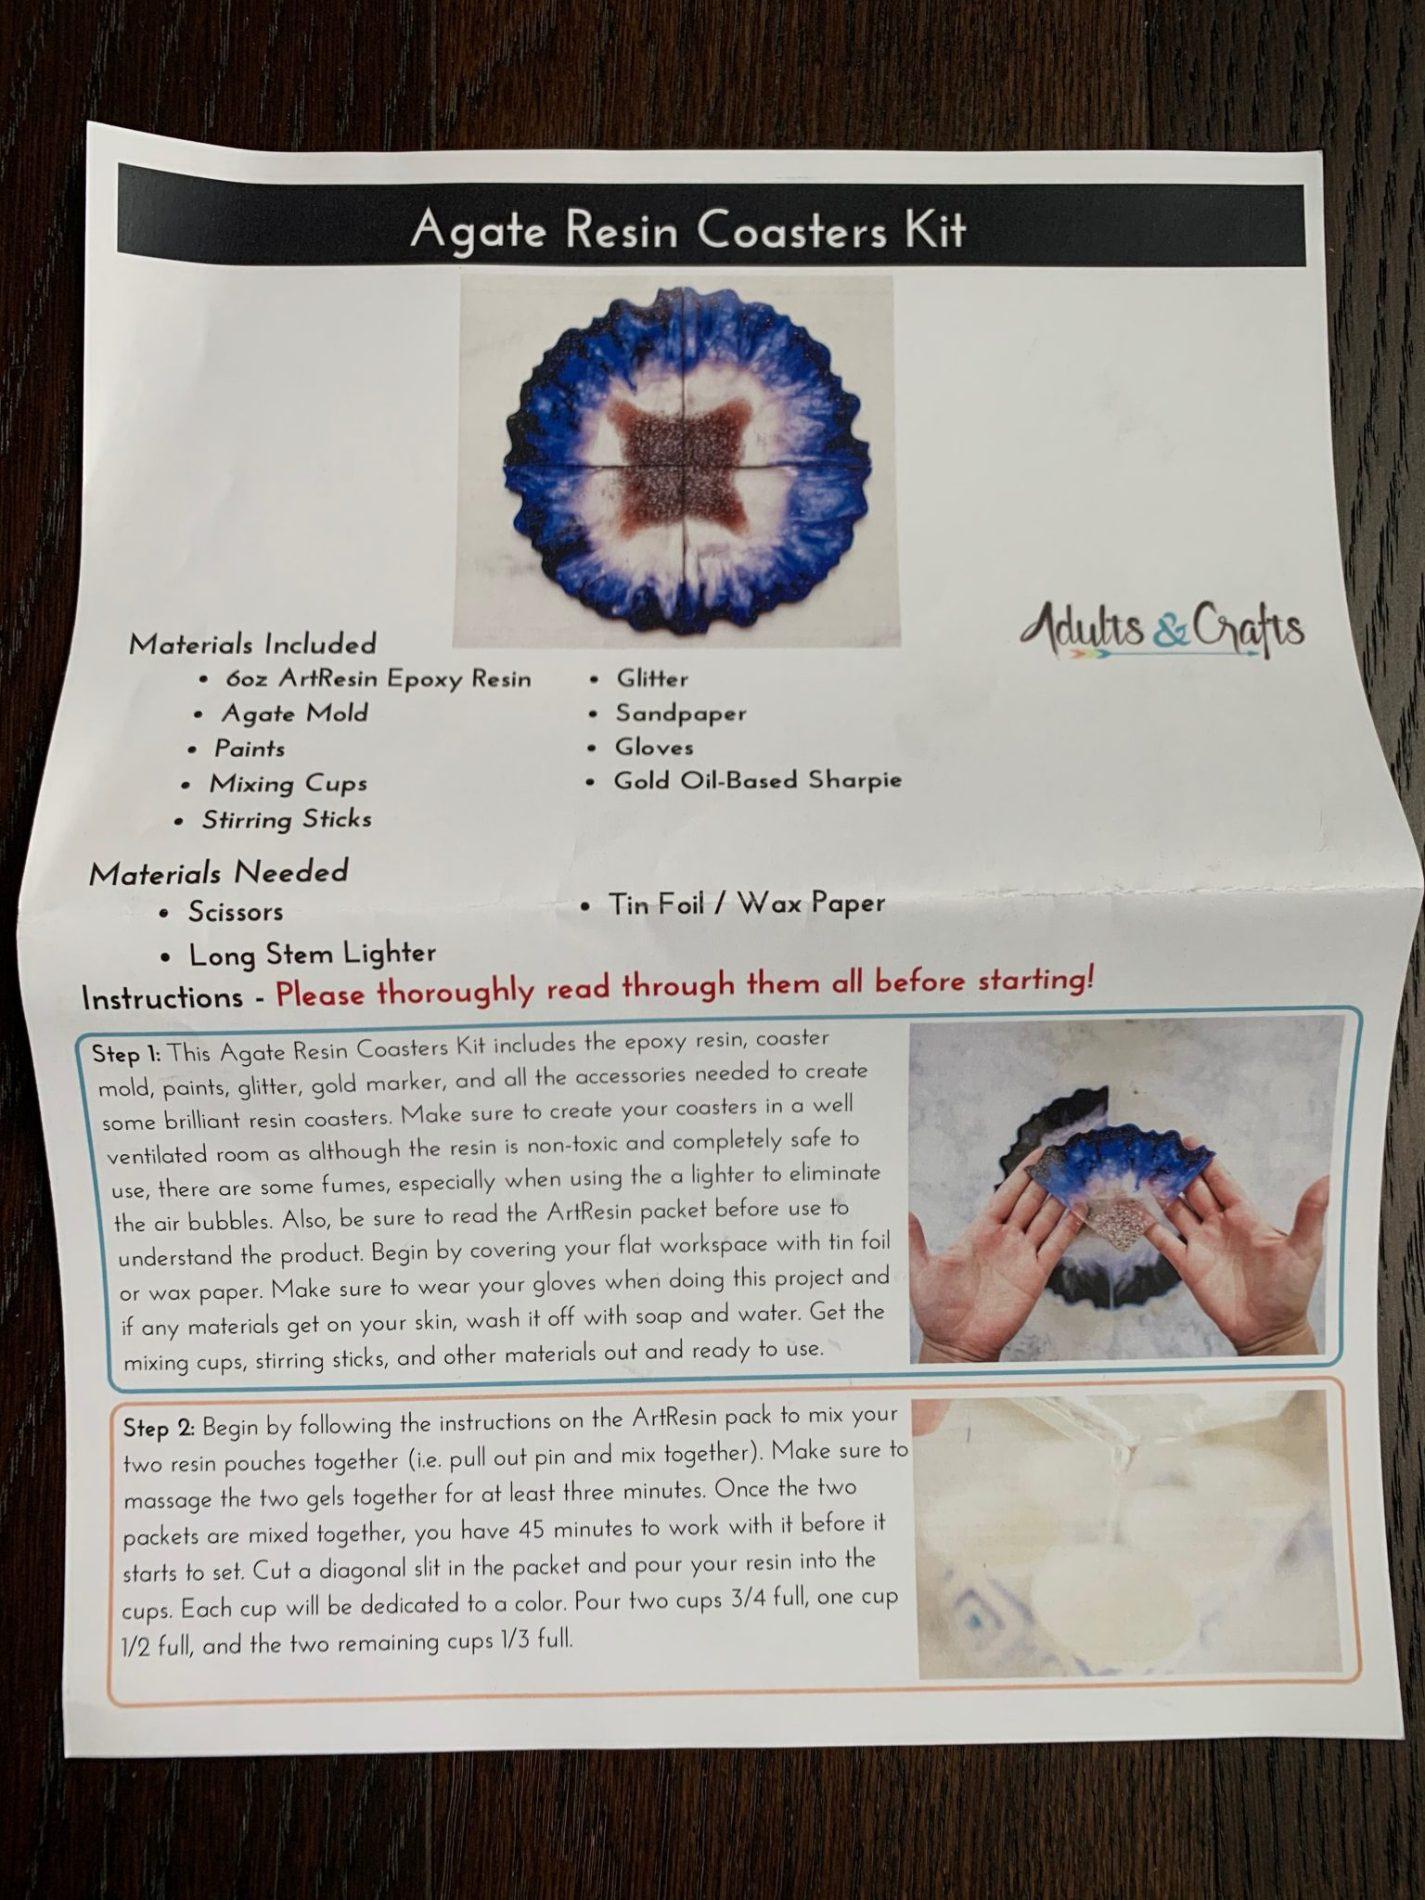
Materials
Materials included were:
~6oz ArtResin Epoxy Resin
~Agate Mold
~Paints
~Mixing Cups
~Stirring Sticks
~Glitter
~Sandpaper
~Gloves
~Gold Oil-Based Sharpie
Additional supplies needed were:
~Scissors
~Long Stem Lighter
~Tin Foil / Wax Paper
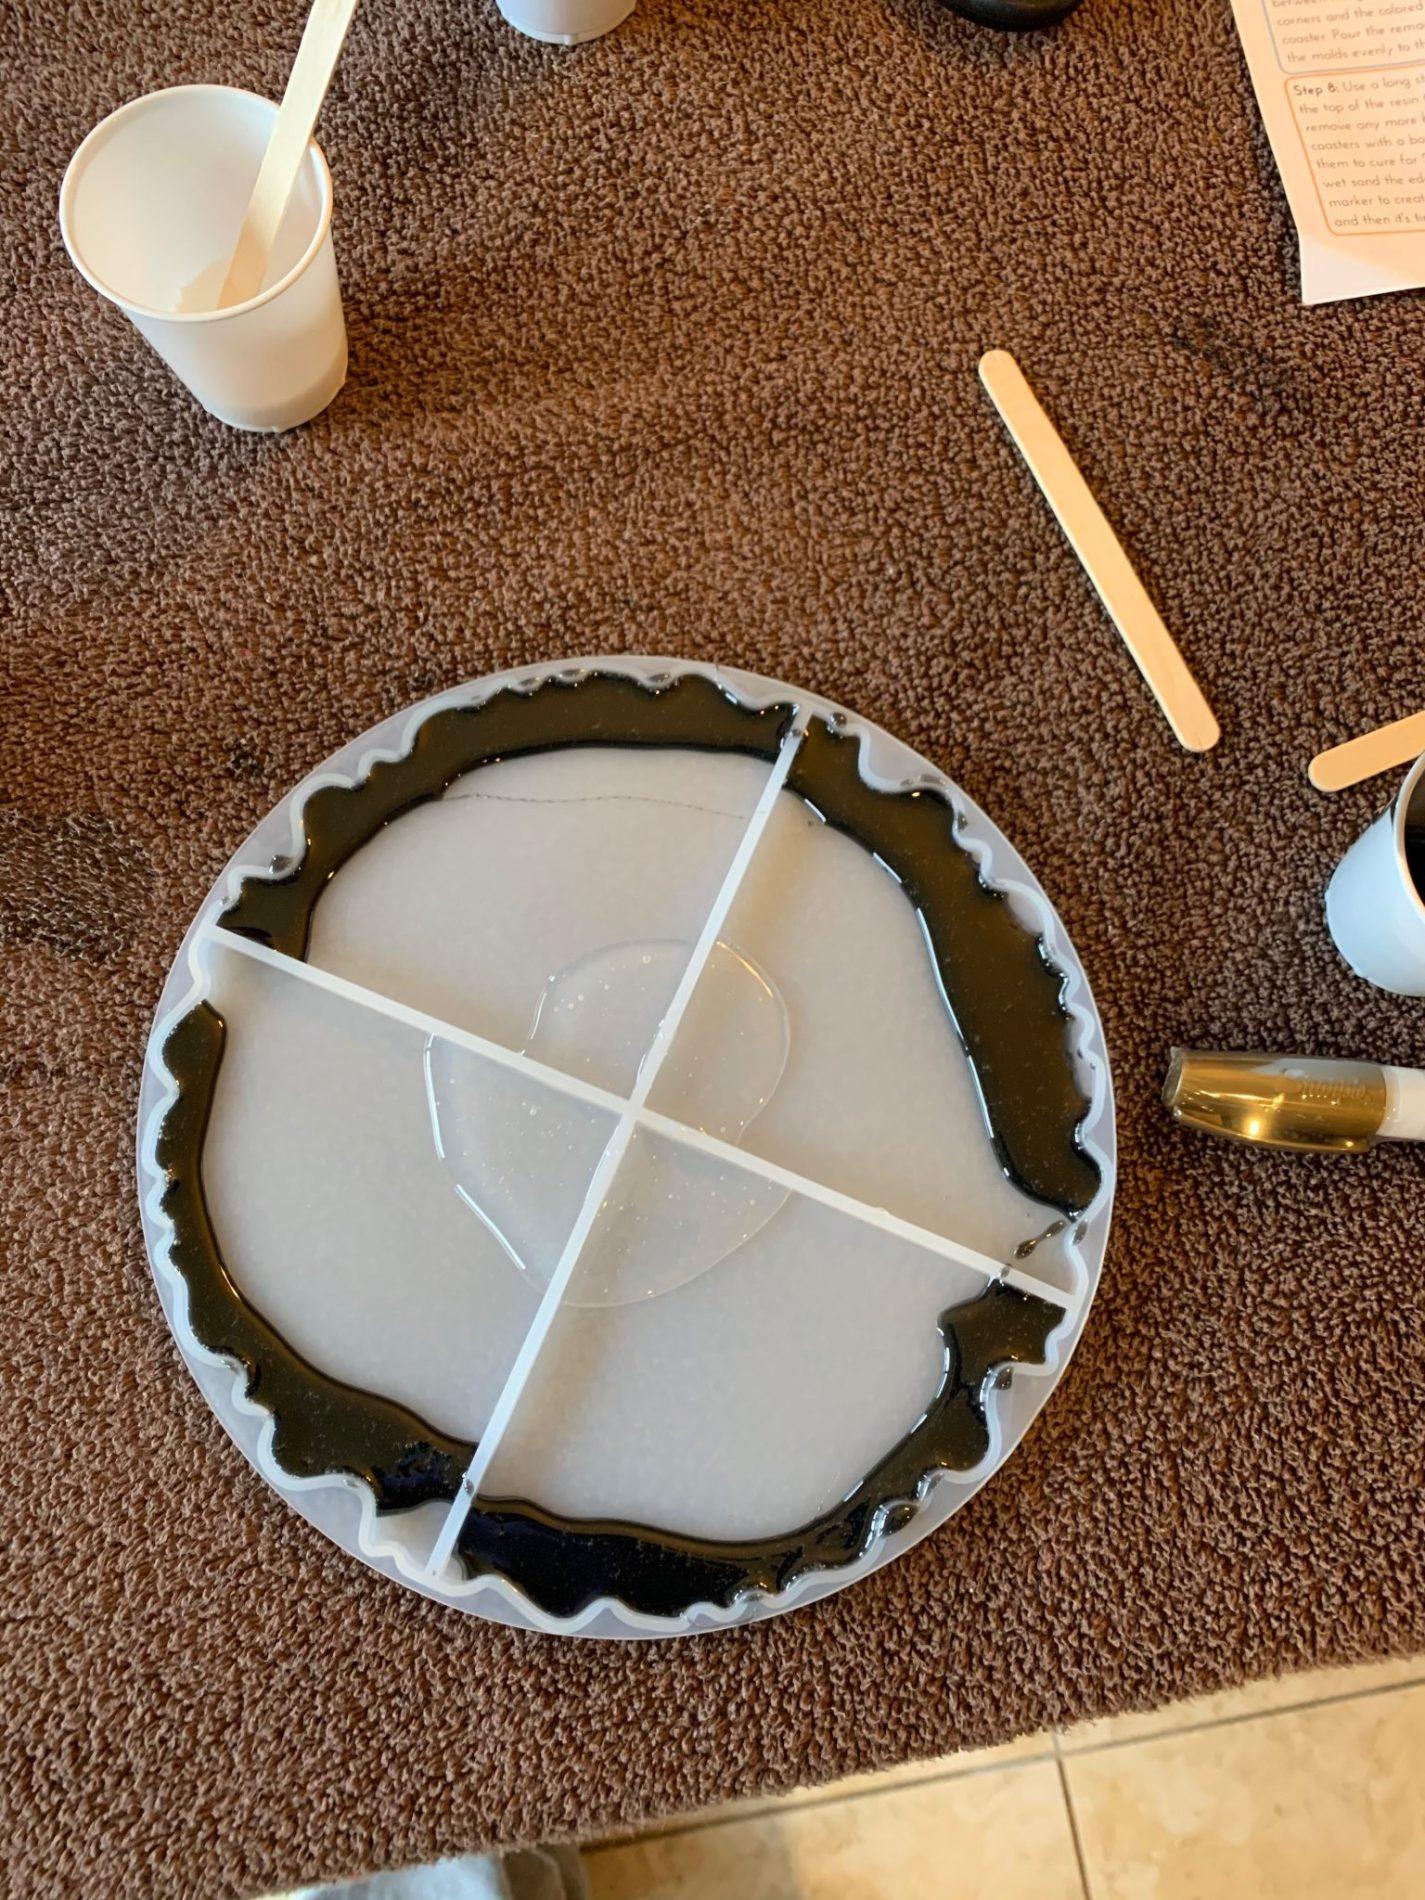
Step #1
The first step was just instructions on how to set up your workspace and gather the materials you would need to get started.
Step #2
The second step was to mix the two resin pouches together to create your resin. Once mixed, you then had 45 minutes to create your coasters before the resin would begin to settle. After mixing, I was instructed to pour the resin into cups in varying amounts.
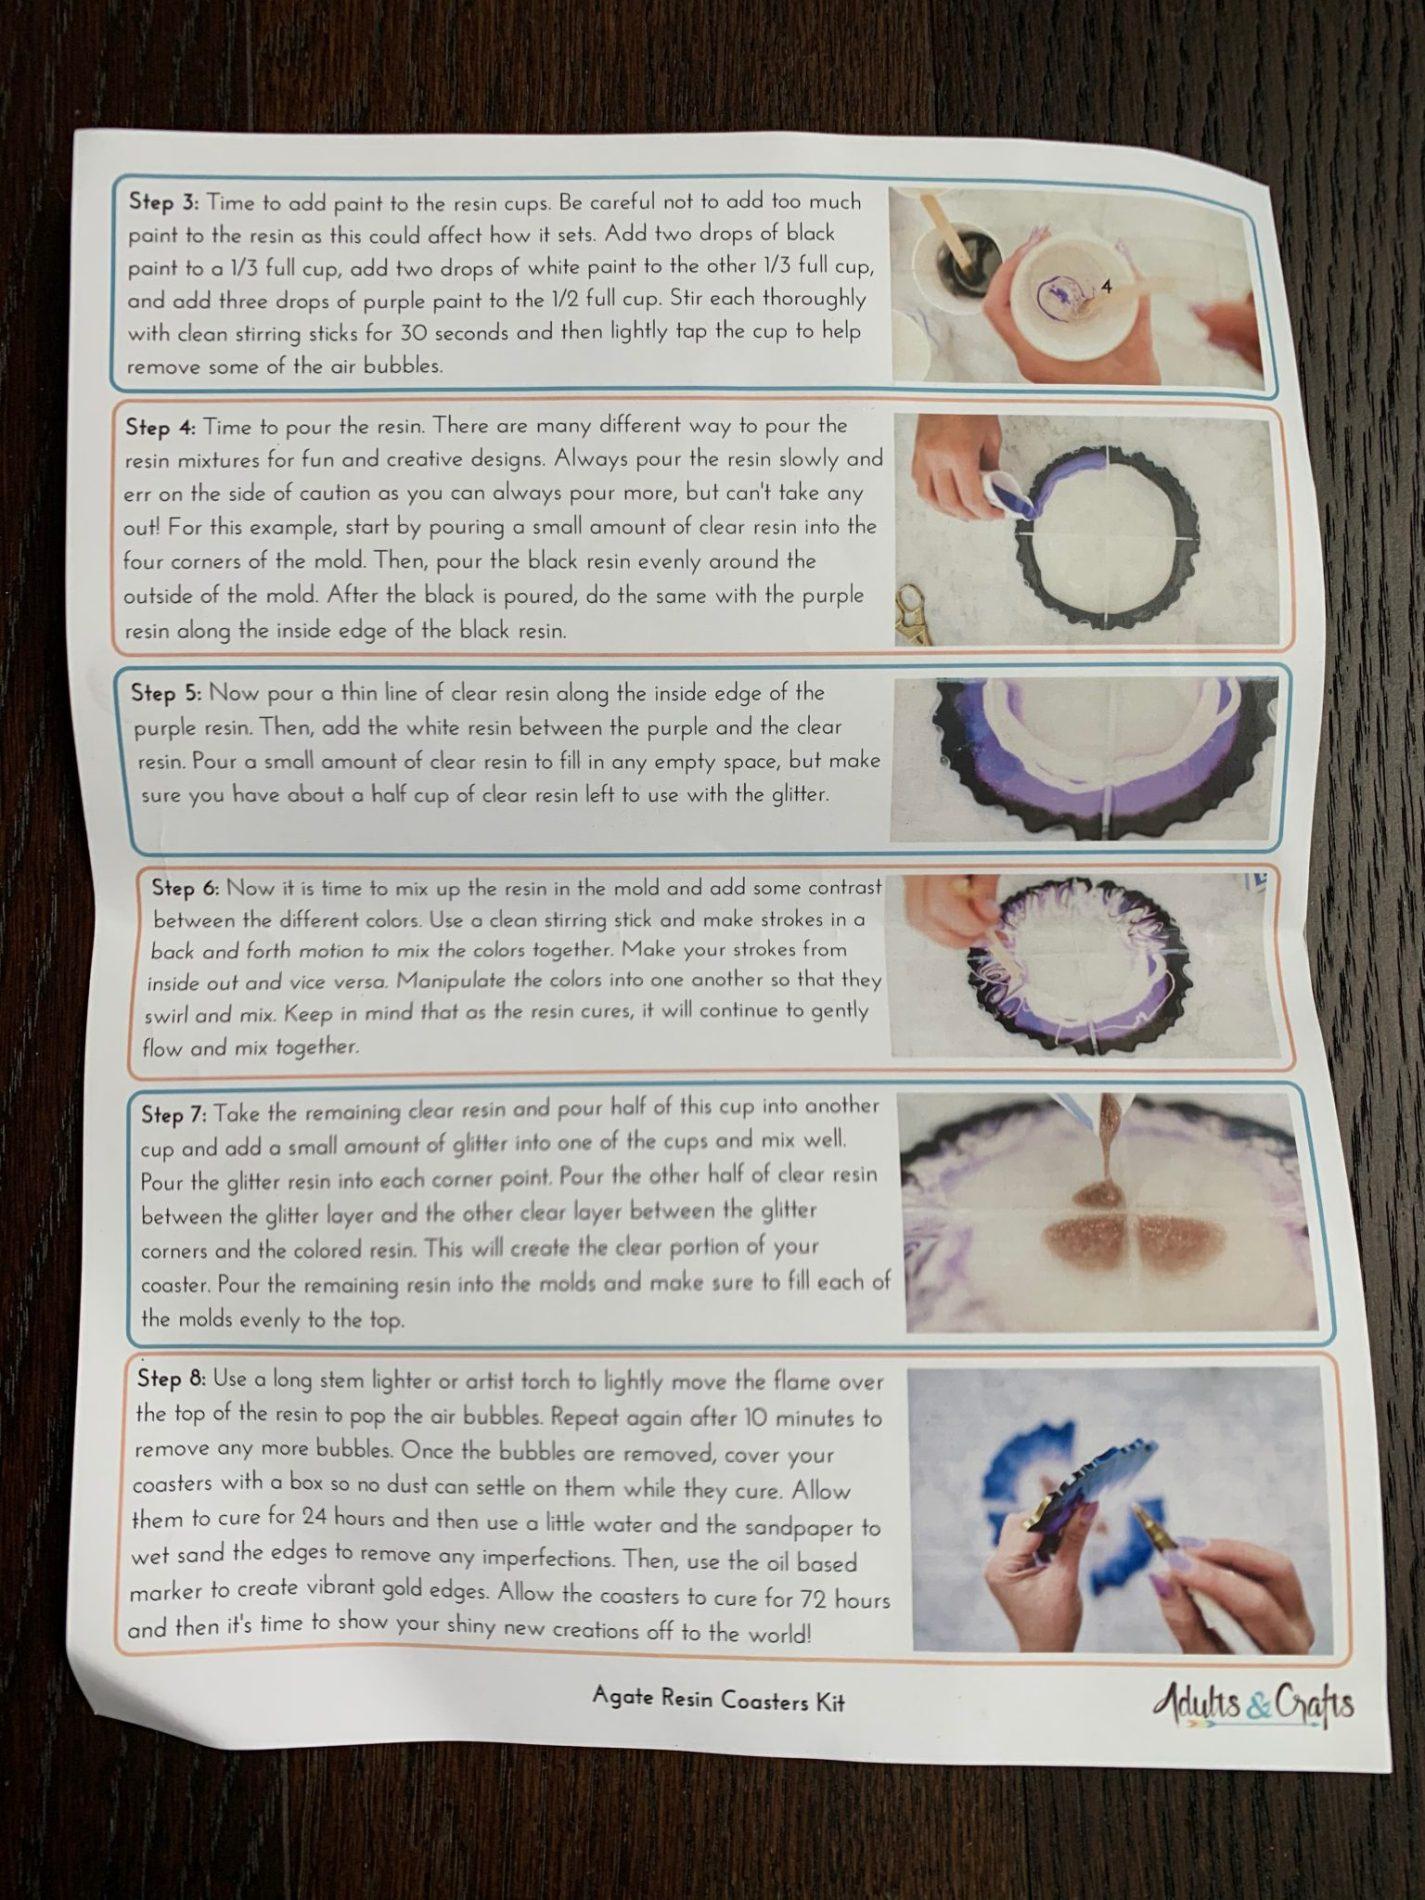
Step #3
Step three was to add paints to the resin cups. The paint came out a little more quickly than I expected, but it ended up being fine.
Step #4 & 5
The fourth and fifth steps were all about pouring the resin into the mold. The resin came out of the cup way faster than I was expecting (I really have no idea what I was expecting) and I worried maybe I ruined the project, but it all seemed to be okay.
Step #6
Step six was mixing the resin in the mold with the included stirring sticks. I felt like there was no right or wrong way to do this so I just went with it!
Step #7
In step seven, I added gold glitter to some of the remaining clear resin and poured it into the four corners of the mold. The remaining cup of clear resin was added between the glitter layer and the other clear layer (next to the colored resin layers). After pouring, I used a long stem lighter to pop any hair bubbles in the mold. The coasters then needed to sit in the mold to cure for 24 hours. 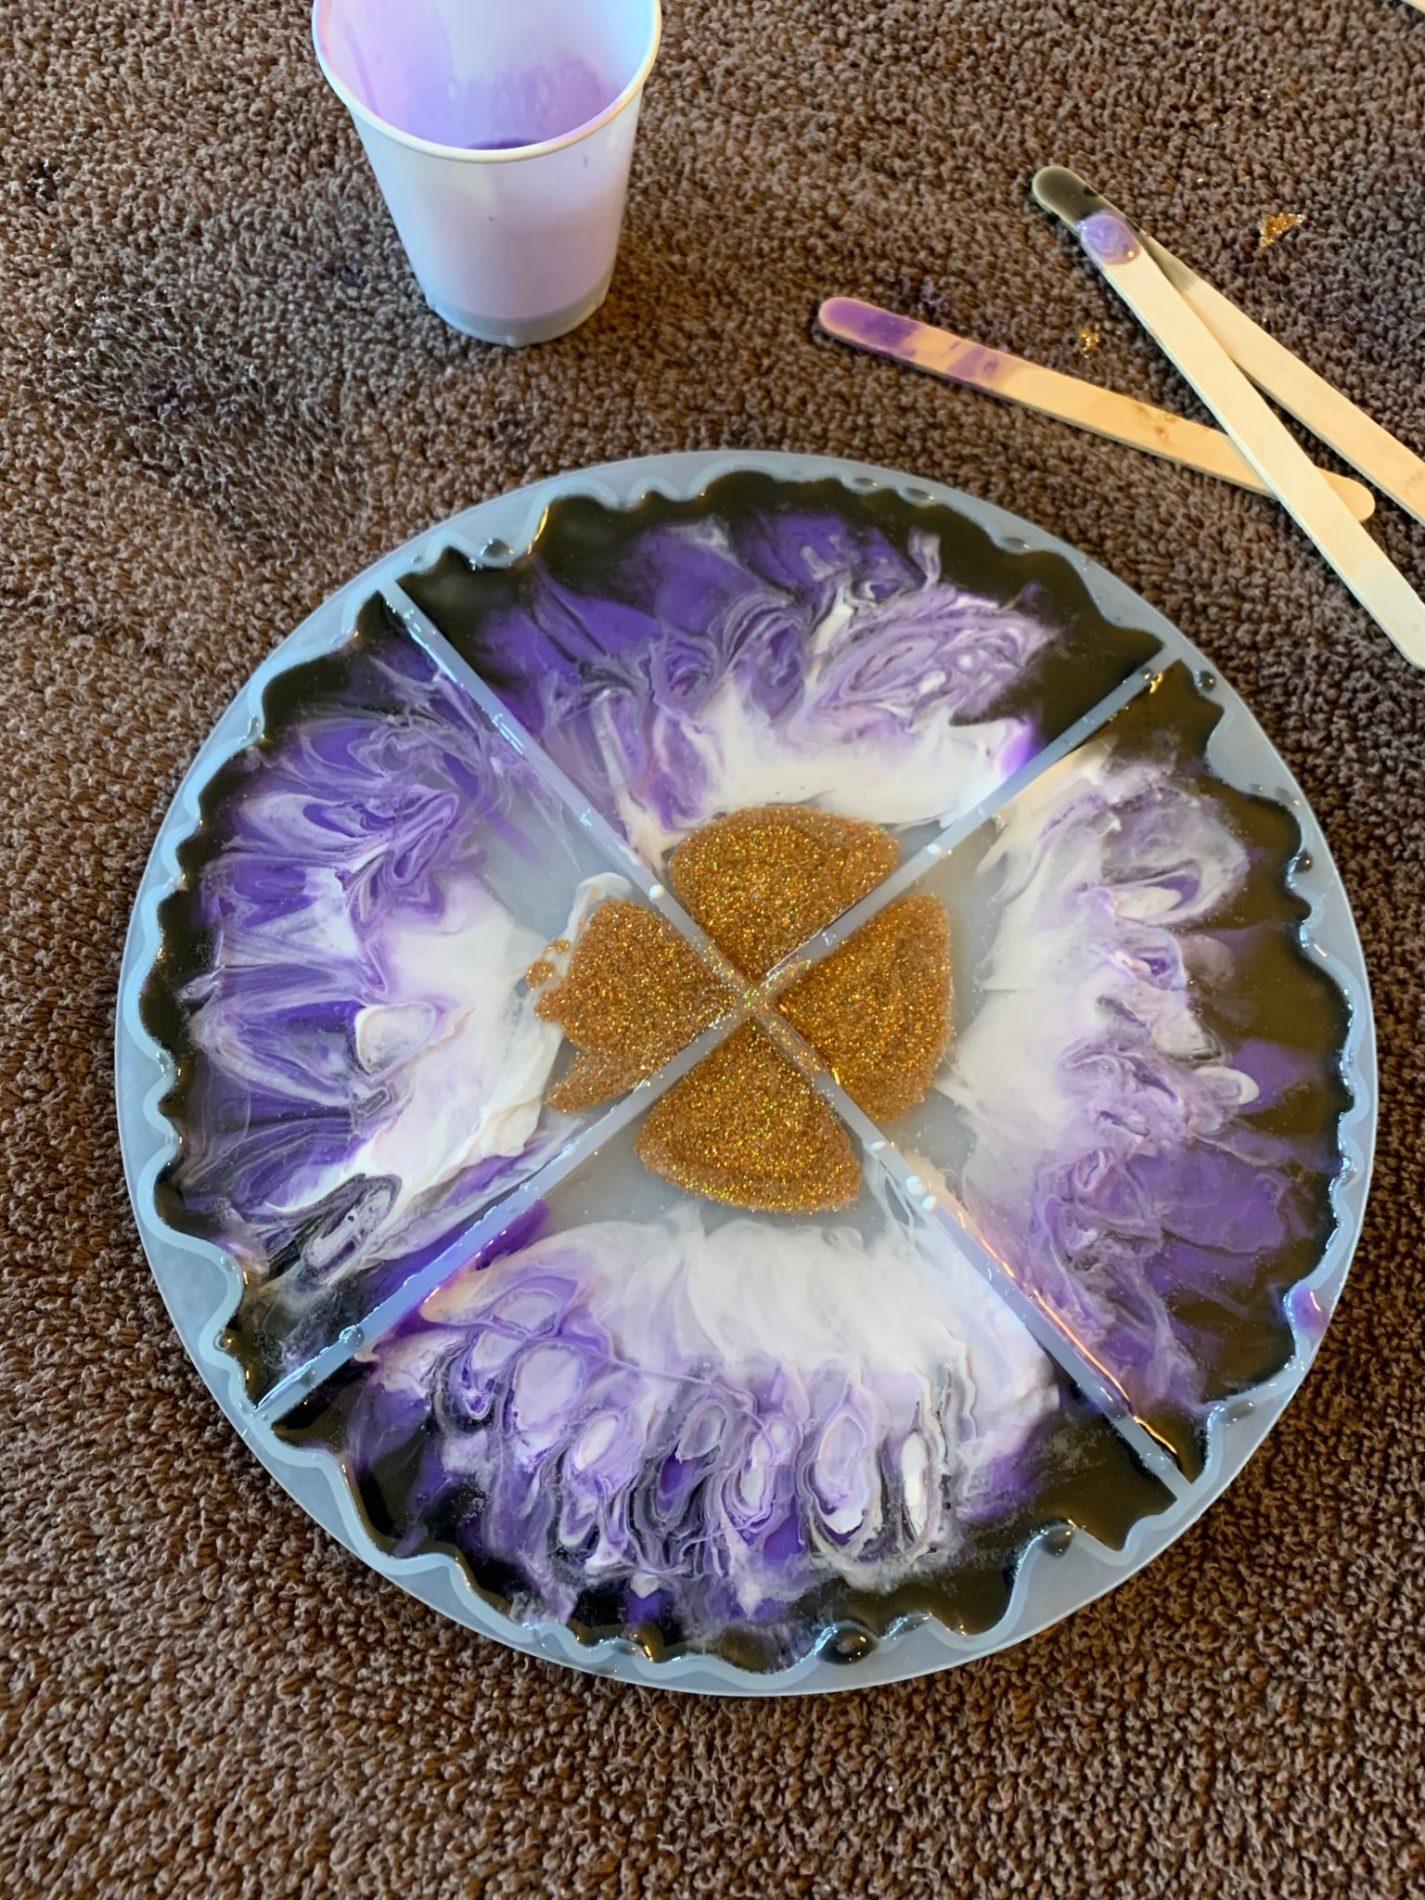 Step #8
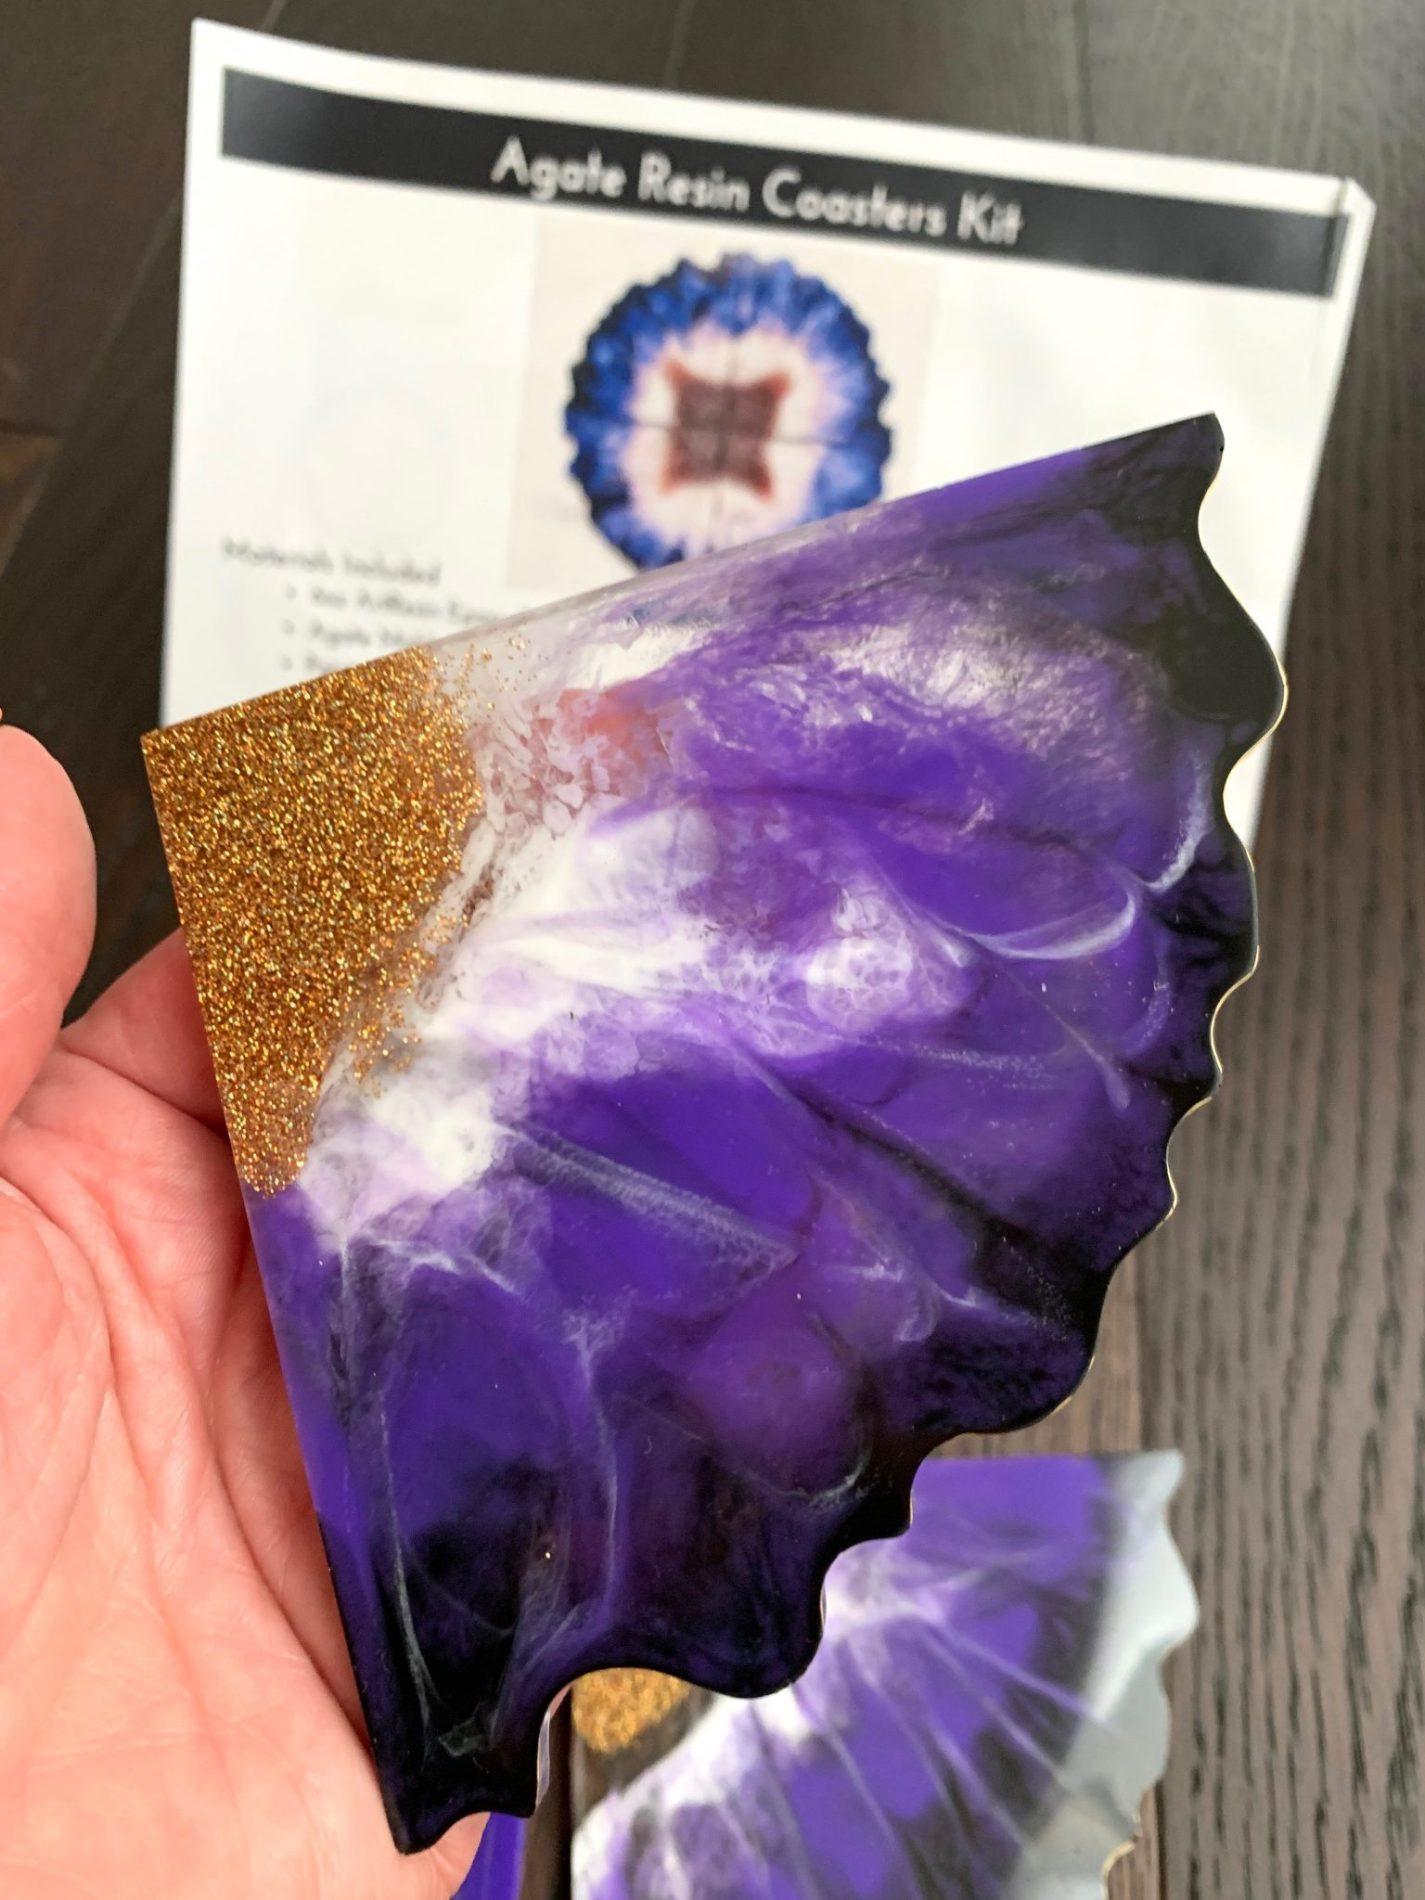
After the 24 hours were up, I carefully removed the coasters from the mold and used the gold marker to color the edges. I still had some air bubbles / imperfections on the corners, but I just let them be.


The coasters need to cure an additional 72 hours before using. After 24 hours they were still on the softer side, but if you let them sit in the mold too long to cure, I doubt you’d be able to get them out.
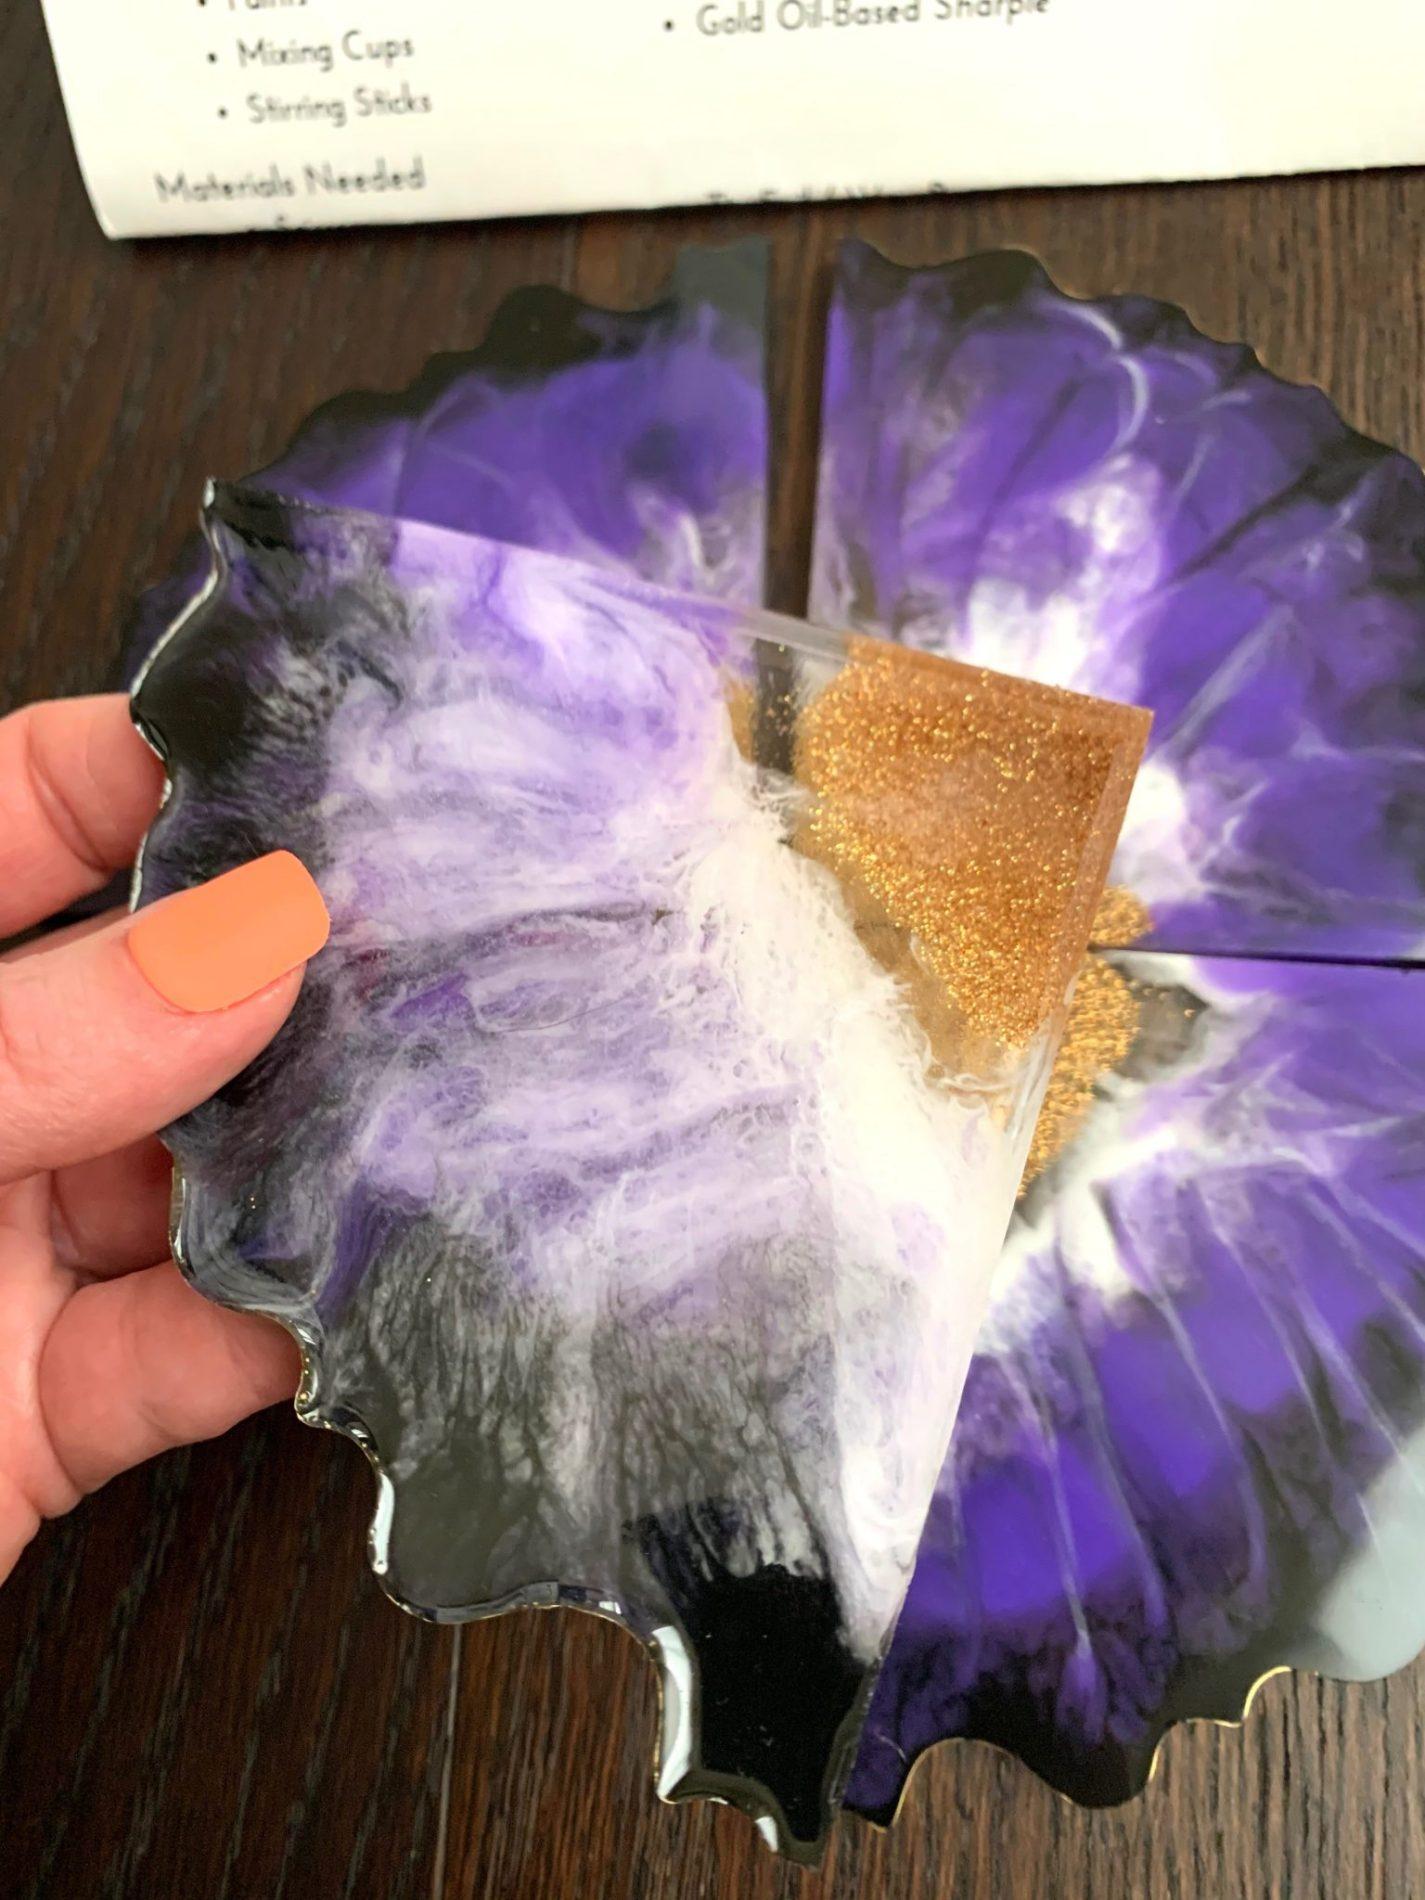
The Final Product
I love how these turned out! I seriously couldn’t be happier and this was a perfect project to keep us (my 7 year-old helped) busy during all this time at home!


What do you think of Adults & Crafts? Right now you can use coupon code “GETCRAFTY” to get free shipping on your subscription.
That’s really pretty. Looks great!