Disclosure: If you make a purchase through the links posted below, I may receive a small compensation. Read the full disclosure.
Doodle Crate
Cost: $19.95/month.
Ships To: United States and Canada.
Coupon Code: “FUNPACK” to save 30% off your first month of Kiwi Crate and their family of brands PLUS score a free activity journal, playing cards and summer chalk set!

Doodle Crate is one of the new(er) lines in the Kiwi Crate family. Designed for girls ages 9-16, Doodle Crate includes all the materials and inspiration for DIY projects such as patterned pouches, friendship bracelets, or colorful candles. Crates encourage girls to tackle new challenges and gain creative confidence!
Doodle Crate ships via FedEx Smart Post and usually takes about a week to arrive to me. I ended up doing the May one before the April one because it looked extra fun, but they are all good.
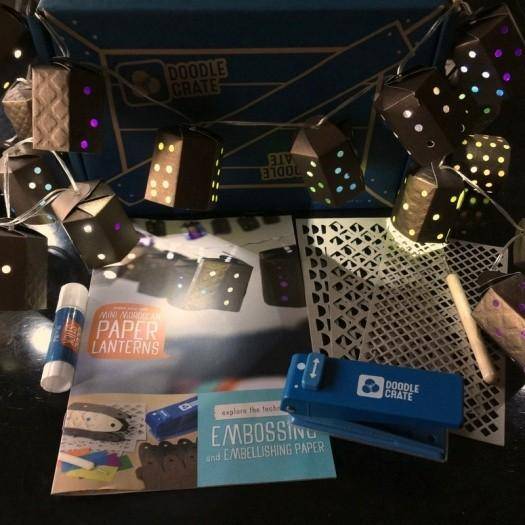
The April 2016 Doodle Crate project was “Make You Own Mini Moroccan Paper Lanterns”.
The information booklet included details on the technique, a little history about embossing and detailed, step-by-step instructions on how to complete the project. They also have a You Tube channel if you need additional instructions.
The box included all of the materials necessary to transform flat paper into perfectly patterned and textured paper through a process called dry embossing. Then you punch holes to let light shine through your embossed paper and you’re ready to fold your way to a whole string of miniature Moroccan lanterns.
Step #1 – Embossing
The first step was to emboss your lantern. The crate included three different rubbing plates, so you select one and then place your lantern sheet on top. Then, using the embossing stylus, you rub the pattern into the panels. It’s tedious more than difficult, but it really works and looks cool. The instructions (which I didn’t see until later) indicated that you shouldn’t emboss the “pendant domes” (the top of the lanterns while the holes) since they won’t show too much, but I did it anyway.
Step #2 – Punching Holes and Step #3 – Adding Color
I didn’t take many pictures of these steps. In order to get the light to shine through you need to punch holes in you lanterns. The crate included a punch tool with two different size holes. I only used the larger hole for my lanterns because the smaller ones didn’t seem to punch all the way through? After punching holes you added tissue paper to the back (inside) of the lantern using glue.
Step #4 – Folding and Assembling
The folding / assembling was the longest step in the process. It wasn’t difficult, but again, it was tedious. And with 20 lanterns, it takes some time. The instructions were clear, however I still ended up doing a few of mine the wrong way so I had to redo. Oops!
Step #5 – Lighting the Lanterns
The final step was to turn on the lights and see if they worked. The crate included batteries, but you do need a screwdriver to get the battery holder open. I loved the way this turned out and was quite pleased with how nicely the colors looked!
What do you think about Doodle Crate? If you are interested in subscribing you can sign up here and use the coupon code “FUNPACK” to save 30% off your first month of Kiwi Crate and their family of brands PLUS score a free activity journal, playing cards and summer chalk set!
