Disclosure: If you make a purchase through the links posted below, I may receive a small compensation. Read the full disclosure.

Doodle Crate is one of the new(er) lines in the Kiwi Crate family. Designed for girls ages 9-16, Doodle Crate includes all the materials and inspiration for DIY projects such as patterned pouches, friendship bracelets, or colorful candles. Crates encourage girls to tackle new challenges and gain creative confidence!
Doodle Crate
Cost: $19.95/month.
Ships To: United States and Canada.
Coupon Code: Use code “SHARE30” to save 30% off your first month of Kiwi Crate and their family of boxes!
Doodle Crate ships via FedEx Smart Post and usually takes about a week to arrive to me.
I am far from a teen/tween, but I subscribe to Doodle Crate for myself. I typically find the projects to be (fairly) simple, fun to do and relaxing.
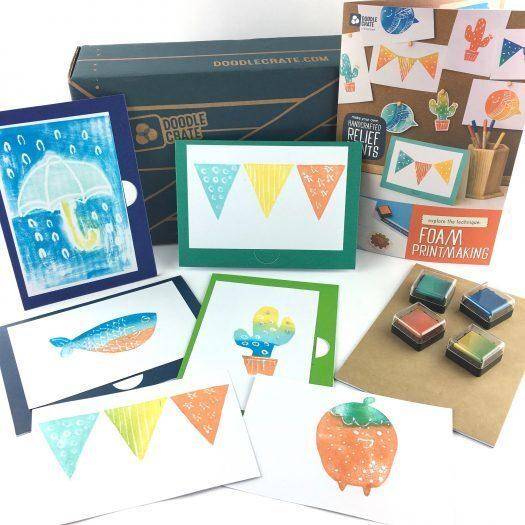
The July 2017 Doodle Crate explored the technique “Foam Making” and included the materials necessary to make your own Handcrafted Relief Prints. The box includes full instructions, but if you feel stuck, they also have a YouTube video for each project.
Materials
This month’s box included foam shapes, printing plates, ink pads, templates, tracing paper, foam sheets, paper, glue stick, pen, pencil, notebook, and cards. Additional items which the instruction booklet says are needed were scissors and paper towel. I used the scissors, but not the paper towel.
Step #1 – Dream Up A Design / Designing with Templates
The first step was to dream up your design. The box included foam shapes to help get you started and also some templates / blank foams to make your own foam shapes. I used both and used the information card as a guideline on what kind of details to use. Don’t make the mistake that I did with the “Hello” or any template with lettering. Mine ended up backward. #fail. I should have read the instructions. The box included a pen which is used not to draw, but to add details. The pen tip worked, but I did end up with ink on my shapes. I feel like they should have provided a different tool for this.
Step #2 – Creating A Printing Plate
Once you make your template, it’s time to create a printing template. All this involved was peeling the adhesive off the foam and placing it on the printing plate template. Easy!
Now it’s time to make your prints. I played around with the ink pads to get an ombre look on some of my designs which I think turned out great!
The box included for cards (all blank on the inside), plenty of white paper and a small notepad, so you can make a ton of prints!
What do you think about Doodle Crate? Did you get a box this month? If you are interested in subscribing, Doodle Crate is currently offering 30% off the first month of a new subscription with coupon code “SHARE30” at checkout.
